

Welding hydraulic fittings can be accomplished safely with the right tools and techniques. Hydraulic fittings are essential components in hydraulic systems. They connect various parts of the system, allowing for the flow of fluids under high pressure.
The eight steps to welding hydraulic fittings include the following:
Step 1: Prepare the fitting
Before you begin welding, you must ensure the area you will be working in is clean, dry and free from flammable materials. Remove dust, dirt or debris from the work surface, and make sure you have all the necessary equipment. This includes a welding machine, helmet, gloves and protective clothing.
Step 2: Choose welding process
There are different welding processes to choose from, including TIG, MIG, and stick welding. MIG welding is the most popular method for welding steel and aluminum hydraulic fittings, as it allows for quick and precise control of the weld bead while producing clean welds.
Step 3: Decide on the filler material
The filler material you choose will depend on the material of the hydraulic fitting you are welding. For example, if you are welding steel fittings, you should use a steel filler rod. On the other hand, if you are welding aluminum fittings, you should use an aluminum filler rod. For stainless steel fittings you should use tig welding or gas tungsten arc welding.
Step 4: Prepare the welding machine
Set up your welding machine according to the manufacturer's instructions. Ensure you have the correct settings for the type of material you are welding and the size of the filler rod you will be using.
Step 5: Clean the fittings
Before welding, clean the fittings thoroughly using a wire brush or sandpaper. This will remove any dirt, rust or corrosion that may interfere with the welding process.
Step 6: Begin welding
Position the fittings so that they are held securely in place. Use a clamp or other holding device to ensure they do not move during welding. Begin welding at one end of the fitting and move to the other, maintaining a steady, even weld bead. Allow the weld to cool before moving on to the next step. 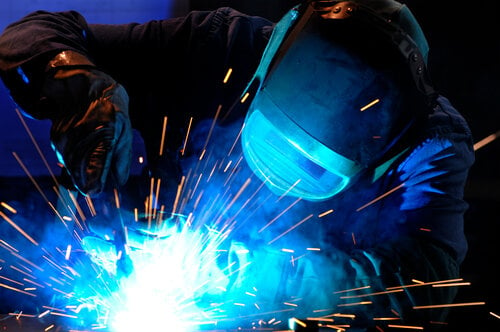
Step 7: Inspect the weld
After the weld has cooled, review it for any defects. For example, look for cracks, voids, or porosity in the weld bead. If you find any defects, you will need to re-weld the fittings.
Step 8: Test the fittings
After welding and inspecting, it is essential to test the fittings to ensure they function correctly. This can be done by pressurizing the hydraulic system and checking for leaks or other issues.
In conclusion, welding hydraulic fittings requires careful preparation and the right tools and equipment. It also requires a good understanding of the welding process. Following the steps outlined above, you can ensure that your welded hydraulic fittings are strong, durable and safe for use in hydraulic systems. Always prioritize safety, wear the necessary protective gear and follow the manufacturer's instructions for your equipment.
To learn more about hydraulics, download this BluPrinton hydraulic maintenance:

.png)